
As an author and an editor, I spend a lot of time editing and a lot of time talking to authors about editing. I also see a lot of beginner authors struggling to move through the quagmire that is self editing. They read through the same manuscript 30 times but they’re still finding errors. And that is for one very simple reason.
We’ll get to the reason in a moment, but first you may be wondering what self editing is. Never fear, dear writer. Read on.
You’ve finished the first draft of your novel and you know the next step is editing, but who does that editing and how? In contrast to edits made by a professional editor, self edits are done by the author.
There is nothing stopping you turning over your first draft to an editor and letting them deal with any issues, but you’ll find that you end up with a more polished edit if you spend just a little time editing it yourself first. Sounds simple enough, right?
Wrong.
We’re taught in school (at least I was) to edit our essays for grammar and punctuation. Hopefully you were even taught grammar and punctuation in school. If you’re anything like me, you left your homework until the last minute and didn’t have time for more than a cursory look using spell check.
If you’ve written a couple of books, you probably know that editing is more than just grammar and punctuation. You may even know that there are several types of editing. Often, we speak of developmental or structural editing, line or content editing, copy editing, and proofreading.
I’ll tell you a little secret, there’s a reason that all these types of editing exist. It’s because our brains can only focus on so much at once. One person cannot look for typos, story issues, and fix sentence structure all at once. Each of these requires a very different type of focus.
An astute reader may have figured out the one simple reason authors struggle with editing by now. There was a hint in the previous paragraph.
Put very simply, authors struggle with editing because they don’t go into it with a plan.
If a professional editor can’t go in and focus on three very different issues at once, what makes you as an author think you can?
What is the alternative?
I’m going to lay out my self-editing process below, including where to slot in any professional editing.
There are a few things you’ll need an understanding of before you jump into this. You’ll need to understand novel structure (there are plenty of books out there on this subject, any of them will work), along with scene structure, how to build tension, and basic knowledge of grammar and punctuation.
Before you start
- Make a copy of your manuscript
We want to make a copy to make sure you have a back-up version.
- Run your manuscript through the grammar report of your chosen editing software—ProWritingAid, Grammarly, etc (optional)
The grammar report will pick up any obvious errors that may distract you during your first read through. Because not everyone has access to this software, I’ve kept this as an optional step. If you know you’re easily distracted by obvious spelling and grammar errors, try a quick run through spell check in your word processor. This grammar report is intended to be a quick activity, if you find yourself hung up on any of the things it’s picking up, move along.
Round One
- Have a novel structure book or other reference handy
Keep this nearby so you can see that the key elements of your chosen structure are appearing in your novel at the appropriate time. If you’re working with something that offers an approximate percentage through your book that various events should occur, try figuring out which page these events should occur before you start reading. I like to add a comment at the top of this page in word noting what the structure suggests should happen. That will remind you to keep an eye out for it as you’re reading.
- Read through your manuscript in full with your focus on story structure
During this read through, keep your attention on the structure of your novel. Are there sections that there isn’t much action, too much information at once, it’s not clear how the characters progressed from point A to point B, plot holes, general novel structure, character development, relationship development, character growth. This may seem like a lot to look at. I like to do this in small chunks, either one chapter at a time or 20 minutes, depending on your personal preference. Take a moment at the end of that period to reflect over what you’ve read looking at the points above. At this stage, we don’t want to be making changes unless they are small things that can be changed within five seconds. For everything else, see the next point.
- Make comments as you’re reading, either in text or in a separate document
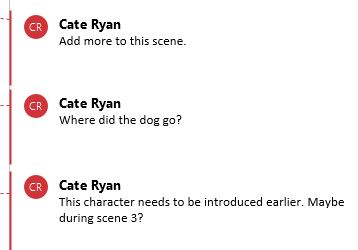
As you’re noticing issues during your read through, note them down somewhere. I prefer to use the commenting feature in Word or Google Docs. You can add as little or as much detail here as you need. To give you an idea of the types of comments I add, here are a few:
- Make an action plan
You may find only minor things that you need to change during this read through or you could find extensive rewrites. Either one is fine. Of course, I’m sure that you as an author would prefer to find only minor things.
How do you know which you’re dealing with? This is where your story structure comes in. How well did your story fit in with that structure? It can be tough to accept that the story just isn’t fitting in, but often it can be fixed with a little creativity.
Let me tell you a story about the first novel I wrote. A little background information first, it was a romance, written in four equal acts (blog post about this structure coming soon), or so I planned. During my first read through, I discovered that I was very happy with the pacing in act 1, the characters were introduced early on, a few things happened to bring the two romantic characters into each other’s worlds, and their attraction was humming along nicely. Act 2 moved along in an okay direction but things really fell off the rails in act 3. There really wasn’t one. The act was supposed to end with one character finding out a lie the other had gone along with in act 1. That happened, but there wasn’t much happening between their first night together at the end of act 2 and this revelation at the end of act 3. Even act 4 was a little shorter than I’d hoped with so little happening in act 3, it was hardly surprising.
With a little brainstorming, I was able to figure out that I’d spent act 2 setting up for a subplot that never went anywhere. By bringing those elements across to act 3 and into act 4, I was able to add an act 3 that had always belonged in the story.
To create a specific game plan, I plotted the new scenes I wanted to include and added notes into my manuscript where they needed to be added. This works as an easy to follow action plan. Once those comments are added, you can simply work through your document and delete the comments once you’ve actioned the item.
If creating an action plan isn’t as simple for your project, go back and look at the comments, where they refer to adding things into the manuscript earlier or later, find where that will be added in and add a comment there.
- Action the comments
Once you’ve got your game plan and comments into your manuscript, you can start working through them. This is likely to be one of the longest aspects of editing. If you’re struggling to keep focused, keep at it for just 20-30 minutes at a time. Take a short break and then jump back in fresh.
- Send to a developmental editor (optional)
You should have a story that you’re happy with at this point. If you’re planning to use a developmental editor, it’s time to send your project off to them.
- Action their comments (optional)
Spend some time reading through your editor’s comments before you start actioning them. If you’re struggling with where to start, create an action plan, then jump into actioning their comments.
Round Two
- Spend some time familiarising yourself with overused words, and how to create engaging writing
You may be familiar with these ideas already, but this is one of the easiest ways to improve your writing. There is no need to eliminate any of these overused words, but it is often an indication that you could improve your word choice or sentence structure to create a more engaging story. Being familiar with what to look out for before you start reading will set you up for a successful round two.
- Read through your manuscript with your focus on building engaging scenes
As with round one, work through a single chapter, or 20-30 minute time reading your manuscript. There is less need to reflect here, but if it is helpful for you, continue with it. In this read through, your focus will be on word choice and sentence structure. You’ll be replacing overused words and phrases with more engaging alternatives, removing confusing sentences, and creating tension using well crafted sentences. If you come across something that can be easily fixed within 20 seconds, fix it up. If not, make a note to come back later using the add comment option.
- Make comments as you’re reading
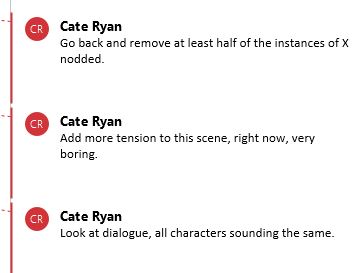
Much like the previous read through, make comments as you read. I’ve added a few comments I’ve used below.
- Action comments
Go back through your novel and action all the comments you added in.
- Send to line editor (optional)
If you’re using a line editor, now is the time to send your project to them.
- Action their comments (optional)
Once you receive your manuscript back, action the comments from the line editor.
Round 3
- Have a style book or other grammar reference handy
I don’t recommend authors go out and spend $100 on a style guide but if you do have one, it’s worth pulling it out for this step. If not, find a basic grammar and punctuation guide online and work with that. For anything you’re not sure of, you can add a comment to ask your editor. You’ll also want a dictionary handy. Only do as much as you’re sure of in this round.
- Read through checking your manuscript for spelling, grammar, and punctuation errors
Read your manuscript and fix any errors you find. If you’re not sure how to fix something, either leave it for your editor, or make a note and do some searching when you’re done with the rest of the read through. You may want to continue working on one chapter at a time or in timed increments.
- Send to copy editor
Once you’ve finished your read through and actioned any comments, send your work through to your copy editor.
- Action comments
When you receive your manuscript back, action any comments. In a copy edit, this often amounts to accepting or rejecting any changes.
Round 4
- Send to proofreader (optional)
Unlike the previous rounds, we want to send the manuscript to the proofreader first. Hopefully you shouldn’t have too many errors left at this point. Make sure to send your style sheet to your proofreader too. This should have been provided by your editor. Some will argue that this step is essential. I won’t get into that debate here. The main reason I’ve left it as optional is to allow for folks who choose not to use a proofreader.
- Action comments (optional)
As with the copy edit, this step will largely involve accepting or rejecting the changes.
- Complete final read through
The manuscript should be error free at this point, but I find that it’s always worth a final read through. This is a great time to try a new font, or have Word read your manuscript aloud to pick up errors you may not have noticed while reading.
Final thoughts
You can choose to use one or all of these rounds depending on what suits you. I find this to be efficient without being over the top, but I know others won’t agree. Use this as a starting point. Come up with your own system. Be organized about your approach to editing. It will save you time and effort.